
Video recipe
Crispy Pan-Fried Pork & Cabbage Buns (Shengjian Bao)
Tender. Crispy. Bursting with juice.
Adapted from Lou4Zou3 | 爐灶
Every step links back to that moment in the video
A Shanghainese street food classic, shengjian bao reaches perfection when a soft leavened crust meets a golden, crackling bottom and a flood of savory broth. This recipe by Cannes uses a double letter-fold technique to eliminate large bubbles, salted dehydrated cabbage for crisp bite, and a flour slurry that steams the buns while frying the base to golden perfection.
Estimated timing — actual time may vary with cooking speed and heat.
What makes this version work
Double letter-fold degassing: Rolling and folding the dough twice eliminates large air bubbles for an exceptionally smooth, uniform bun skin
Salt-curing for crisp cabbage: Finely diced cabbage is cured at a 100:1 ratio with salt and thoroughly wrung out so the filling stays crunchy without watering down
Staged filling and floating dough test: Pork is whipped with salt first to develop gel structure, mixing cabbage in only at wrapping; a tester dough ball floating in water signals perfect fermentation
Flour-water steam-fry method: Buns are seared for 3 minutes to set the base, then steamed with flour slurry under a tight lid until water evaporates into a lacy, crunchy bottom
Ingredients
Tap to check off — your progress is saved
Meat Filling
- Minced pork shoulder butt 160gPork collar/butt with good fat marbling for maximum juiciness
- Salt (for pork) 2.5gAdded first to release meat protein and build stickiness
- Light soy sauce 5gAdds savory baseline flavor
- White pepper powder 1g
- Chicken powder 1g
- Granulated sugar 3gBalances saltiness and rounds out flavors
- Sesame oil 4g
- Shaoxing rice wine 3g
- Mashed ginger 8gFinely grated to remove meat gameyness
- Finely chopped scallions (for filling) 15gFinely minced, folded into filling before chilling
- Green cabbage 230gOriginal weight 230g; diced to nail size and wrung out to ~150g
- Salt (for cabbage dehydration) 3gTossed at 1:100 ratio to draw out moisture
Dough Ingredients
- All-purpose plain flour 200gPlain flour (~8.9%-9% protein); add slightly more water if protein is higher
- Instant yeast 3gDissolved in water before mixing with flour
- Water 105gRoom temperature; use iced water in hot weather to slow down yeast
- Oil (peanut oil) 6gKneaded into dough for elasticity and sheen
Pan-Frying & Garnish
- Cooking oil (for skillet) 20mlAbout 1-2 tbsp to coat the skillet after preheating
- Plain flour (for slurry) 6gForms the crispy golden lacy skirt
- Water (for slurry) 200gMixed thoroughly with 6g plain flour
- Finely chopped scallions (garnish) 10gSprinkled over buns near the end of cooking
- Toasted white sesame seeds 8gAbout 5-10g toasted white sesame seeds
Equipment
- Flat-bottomed skillet with tight lid (gas stove preferred)
- Handled roller & wooden rolling rod
- Coarse cheesecloth or mesh bag (for wringing cabbage)
- Bench scraper & filling spatula
- Digital kitchen scale
Steps
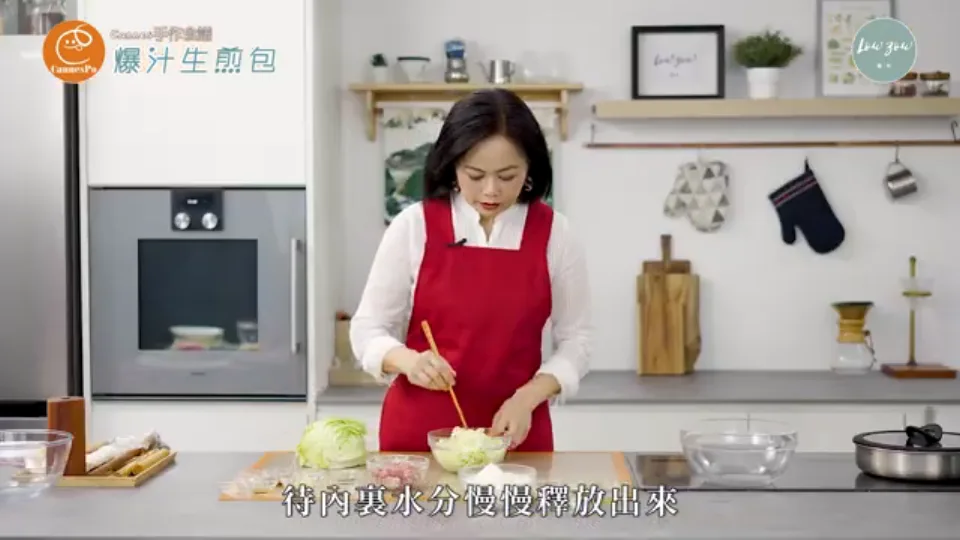
Dice cabbage and cure with salt to draw out water
 Time 30 min
Dice washed cabbage into fingernail-sized pieces. Toss thoroughly with 3g salt (at a 1:100 ratio for 230g cabbage) and let rest for about 30 minutes to draw out excess moisture while preserving its crisp texture.
How to tellLiquid pools at the bottom of the bowl and cabbage pieces wilt slightly while staying crispWatch at 1:46Mix minced pork with salt and soy sauce to develop gel
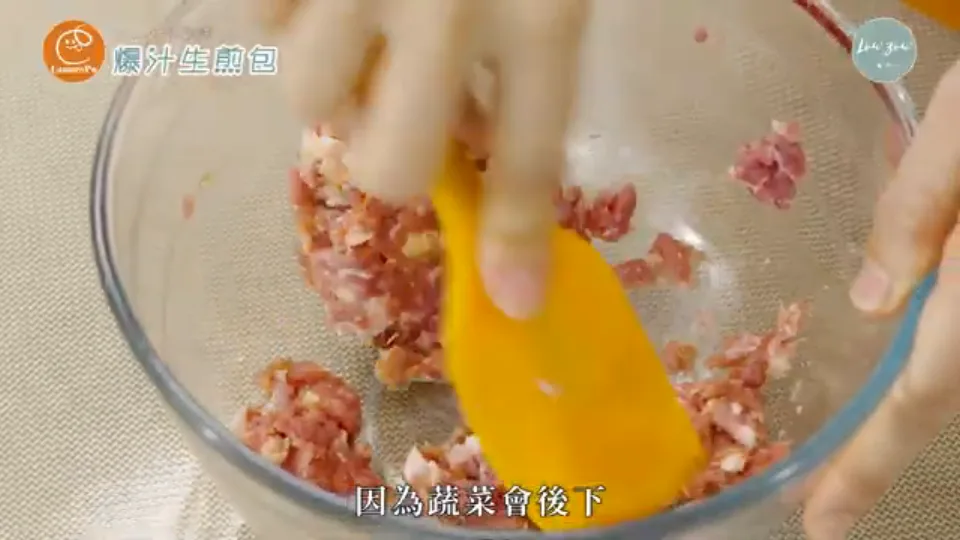 Time 5 min
Place minced pork shoulder butt into a glass bowl. Add the salt and light soy sauce first, stirring vigorously in one direction with a spatula until the meat becomes sticky and gelatinous, ensuring a cohesive, juicy meatball that will not crumble.
How to tellPork transforms from loose grains into a pale, sticky, emulsified pasteCommon mistakeDo not add vegetables at this stage; early moisture will prevent the meat from developing elasticityWatch at 2:20Season filling with aromatics and chill in the fridge
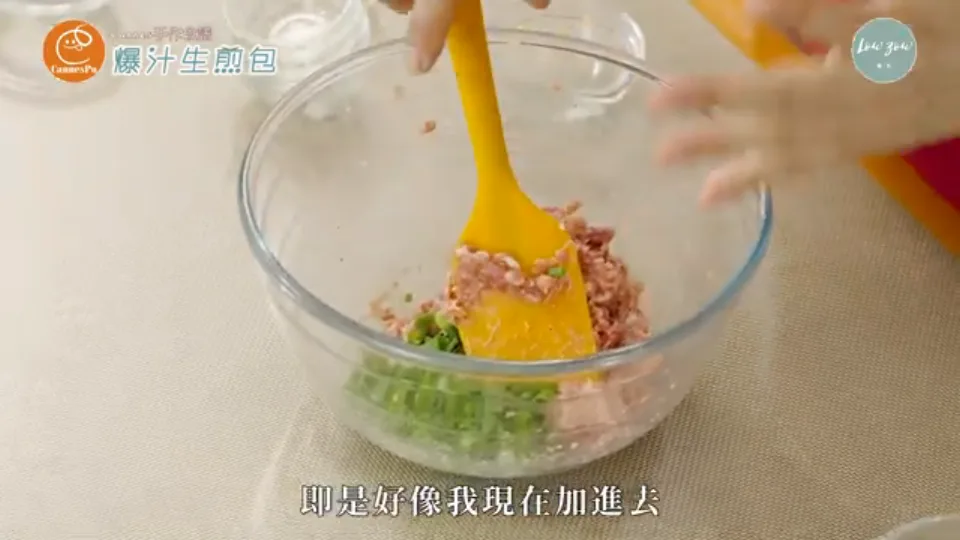 Time 5 min
Add white pepper, chicken powder, sugar, Shaoxing wine, sesame oil, and grated ginger into the meat paste. Fold in finely chopped scallions, then cover and chill in the refrigerator for about 1 hour so the fat firms up for effortless wrapping.
How to tellSeasonings fully integrate with scallions evenly distributed throughout fragrant pork fillingWatch at 2:55Wring out cabbage thoroughly in a coarse mesh bag
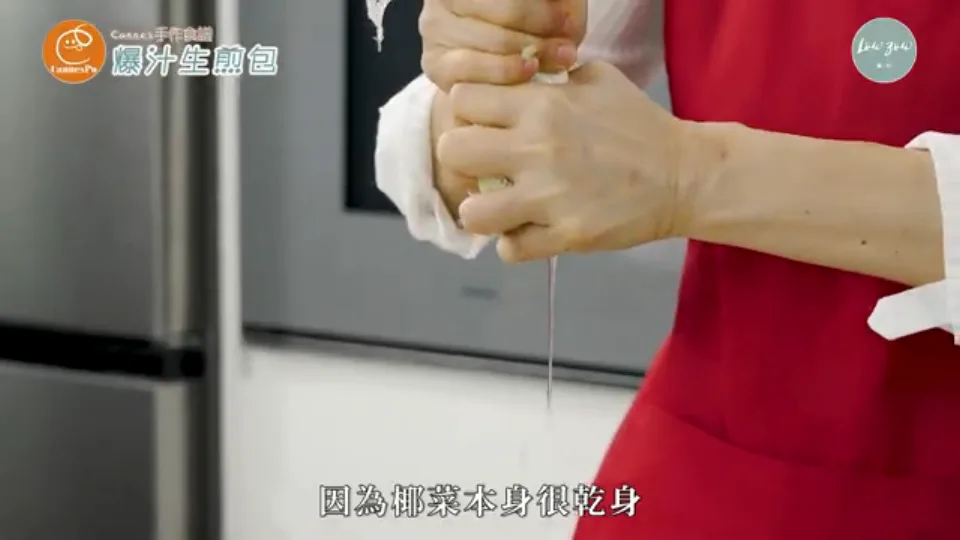 Time 5 min
Transfer salted cabbage into a coarse mesh bag or cheesecloth. Twist and squeeze with maximum force to express as much liquid as possible, reducing the cabbage from 230g to roughly 150g of dry, crunchy vegetable bits.
How to tellJuice streams out under tight wringing, leaving light, dry cabbage flakesCommon mistakeUse a coarse mesh cloth; dense fabrics trap moisture and prevent thorough drainingWatch at 3:53Dissolve yeast in water and knead dough until smooth
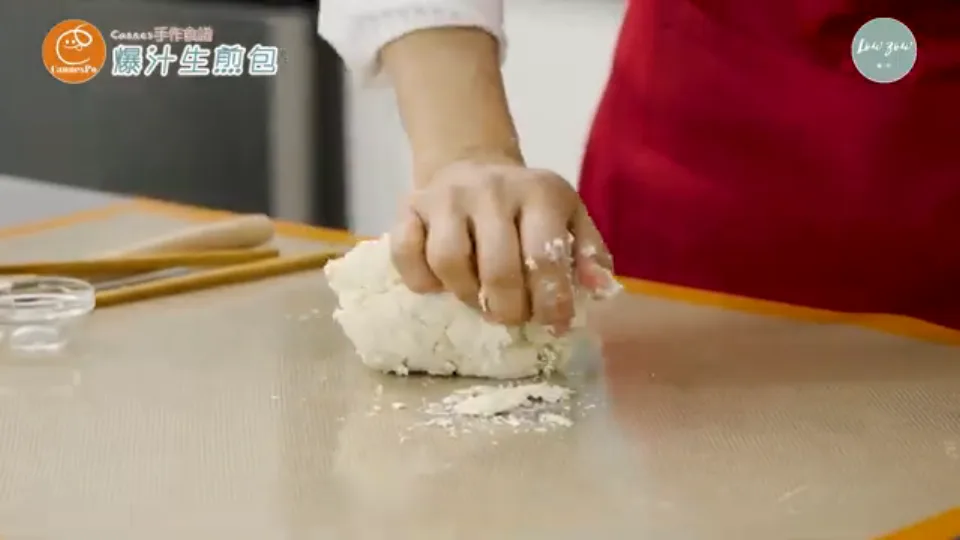 Time 10 min
Dissolve instant dry yeast in room-temperature water, then pour into plain flour and peanut oil. Stir into shaggy dough flakes with chopsticks, turn out onto a work surface, knead until supple and smooth, then cover with plastic wrap and rest for 5 minutes.
How to tellDough becomes cohesive, elastic, and smooth without sticking to hands or counterCommon mistakeIf using higher-protein flour and the dough feels stiff, slightly tear it open, add a splash of water, and knead againWatch at 5:12Perform double letter-folds to degas and smooth the dough
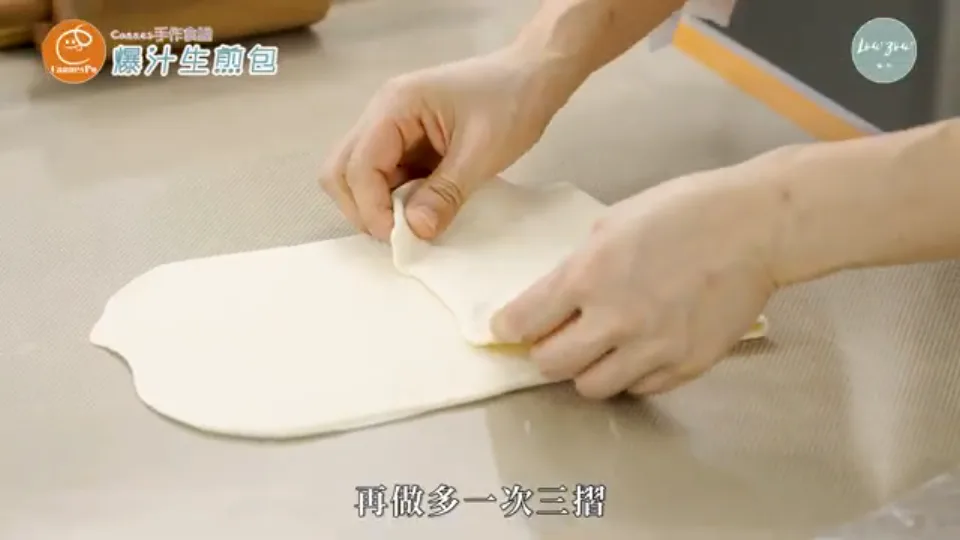 Time 5 min
Roll rested dough into a long flat rectangle using a rolling pin to crush large air bubbles. Fold into thirds like a business letter, rotate 90 degrees, roll flat again, and fold into thirds a second time to ensure an ultra-uniform, smooth crumb.
How to tellFolded dough slab has a compact, silky surface with zero visible air pocketsWatch at 8:00Roll dough into a cylinder and divide into 10 equal portions
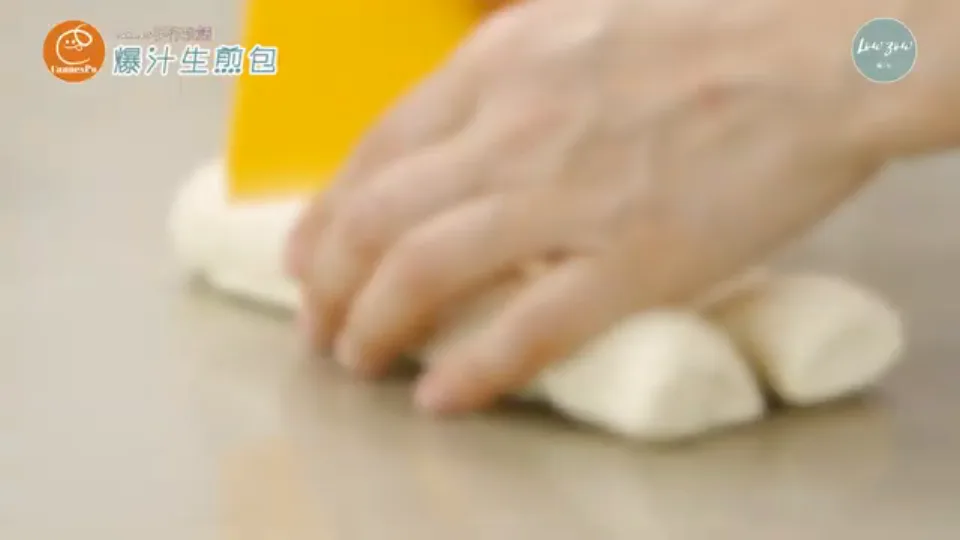 Time 5 min
Roll the dough out lightly and roll tightly into an even cylinder. Use a bench scraper to divide into 10 equal portions of roughly 30g each, rounding the cut ends gently and covering with plastic wrap. Reserve a tiny piece of excess dough as a fermentation test ball.
How to tellEven dough cylinder cleanly sliced into ten uniform 30g roundsWatch at 9:05Roll wrappers thin around the edge with a thicker center
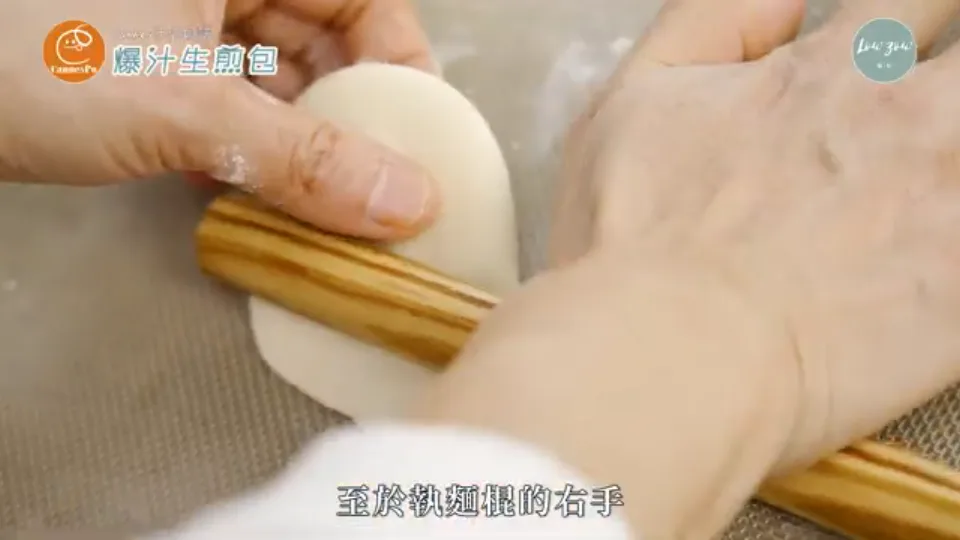 Time 10 min
Lightly dust the counter, flatten a dough ball with your palm, and roll with a thin rolling rod. Push firmly inward and release on the return while your other thumb rests in the center to rotate the wrapper, creating a 9-10cm disc with thin edges and a sturdy, thicker middle.
How to tellWrapper measures 9-10cm across with a raised, thick center and delicate tapered perimeterWatch at 10:30Fold cabbage into chilled meat and divide into 10 portions
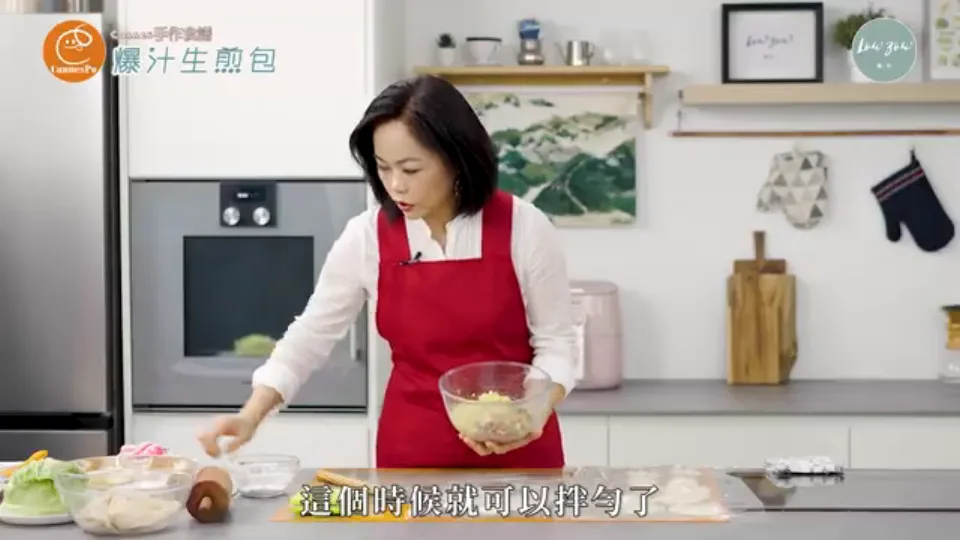 Time 3 min
Retrieve the chilled pork filling from the fridge and gently fold in the dehydrated cabbage until evenly distributed. Weigh the mixture and divide into 10 equal portions of roughly 33g each, preserving maximum vegetable crispness right up to assembly.
How to tellCabbage is cleanly distributed throughout the firm meat without any pooling moistureWatch at 11:10Cup wrapper in palm, fill, pleat, and seal tightly
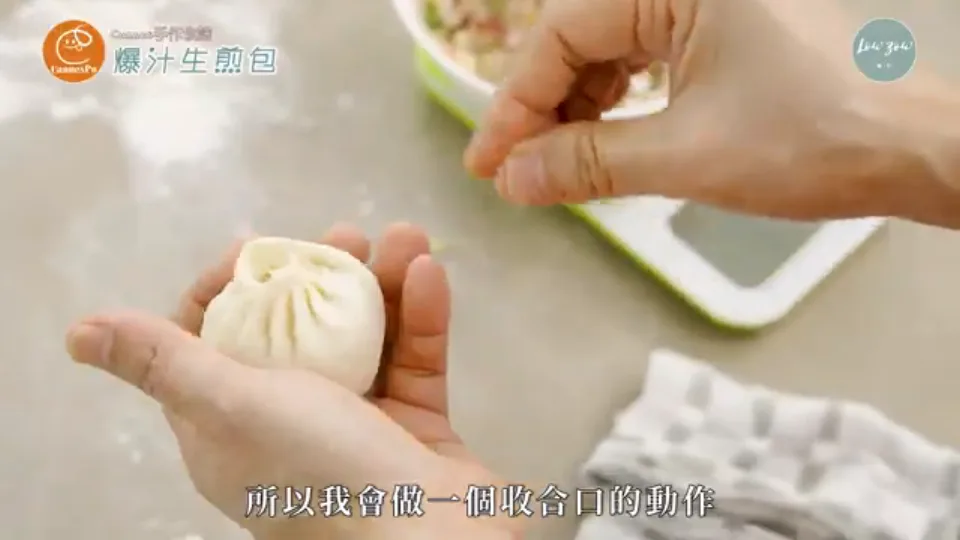 Time 12 min
Cup a wrapper in your palm, place 33g of filling into the center depression, and keep the perimeter spotless. Use your left thumb to anchor the filling while your right thumb and index finger gather tight pleats around the crown, pinching firmly to seal in every drop of broth.
How to tellTop pleats converge into a tight, secure central twist with no visible seams or leaksCommon mistakePinch the top shut with firm pressure; any weak spot will blow open under steam pressureWatch at 13:05Proof on floured tray and test readiness with floating ball
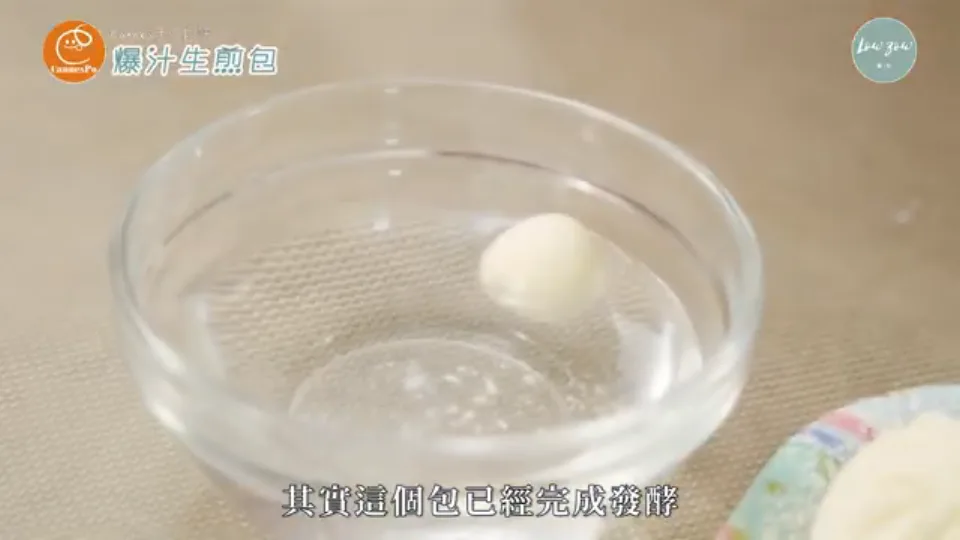 Time 35 min
Dust a tray with flour, arrange the buns with space between each to prevent sticking, and place the test dough ball beside them. Proof in a warm place (30-38°C) for 30-40 minutes. Drop the test dough ball into water: if it floats buoyantly, fermentation is complete.
How to tellBuns swell noticeably and the small test dough ball floats buoyantly on waterWatch at 14:40Preheat oiled skillet and sear bun bases until golden
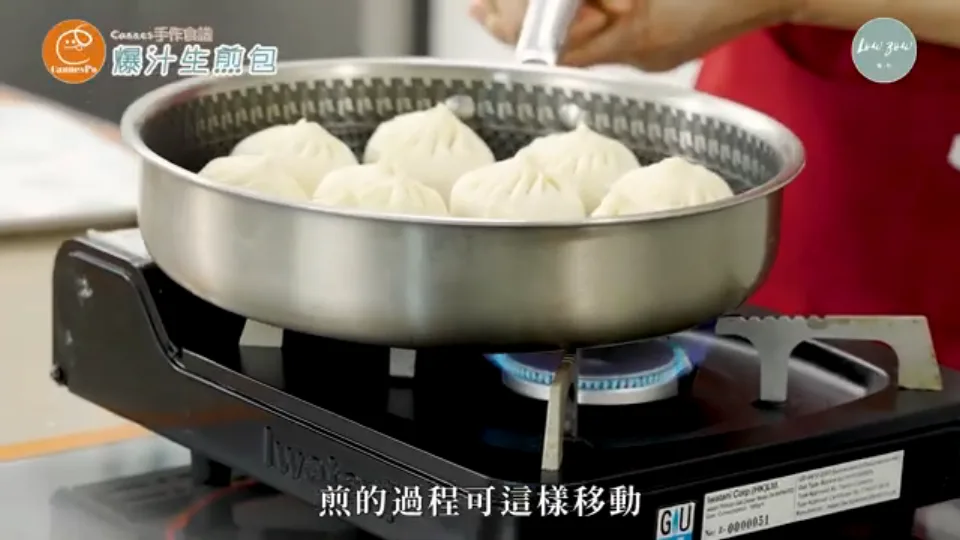 Time 3 minHeat Medium to low
Add 1-2 tbsp oil to a flat skillet, preheat over high flame, then lower heat. Arrange buns from outer rim inward, leaving room for expansion. Pan-fry over medium heat for 2-3 minutes, swirling the pan gently until bases take on a light golden color.
How to tellOil crackles rhythmically and lifting a bun reveals a crisp, pale-gold undersideWatch at 15:30Pour flour slurry to 1/3 height, cover, and steam-fry
 Time 10 minHeat Medium-low
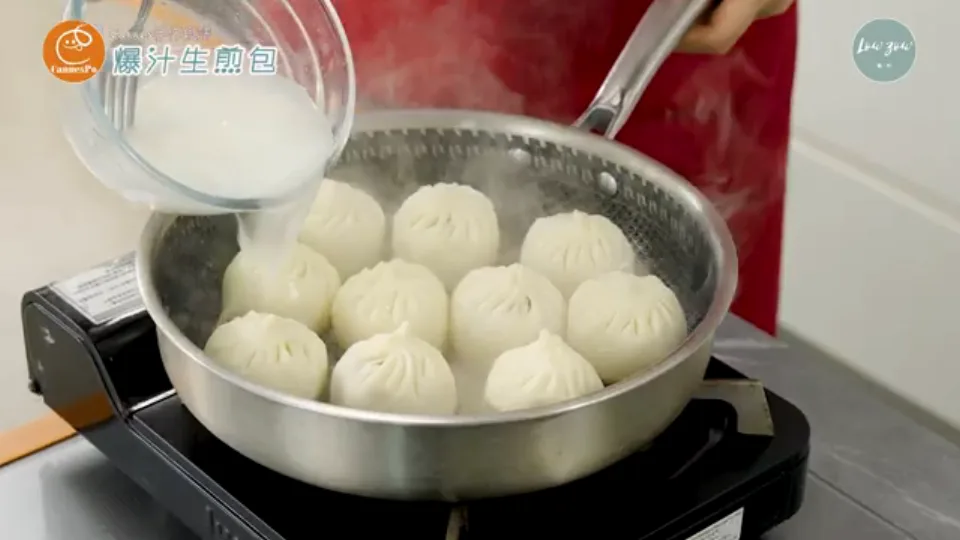
Mix 6g plain flour with 200g water into a slurry. Once bun bases color lightly, pour the slurry around the buns until it reaches at least one-third up their sides. Cover immediately and steam-fry over medium-low heat for 8-10 minutes.
How to tellMilky flour water boils vigorously around swelling buns with thick steam condensing on lidCommon mistakeKeep heat at medium-low; excessive flame will evaporate liquid too fast and burn the bottom before meat cooksWatch at 16:05Scatter scallions and sesame, crisping bottom to golden brown
 Time 2 minHeat Low flame
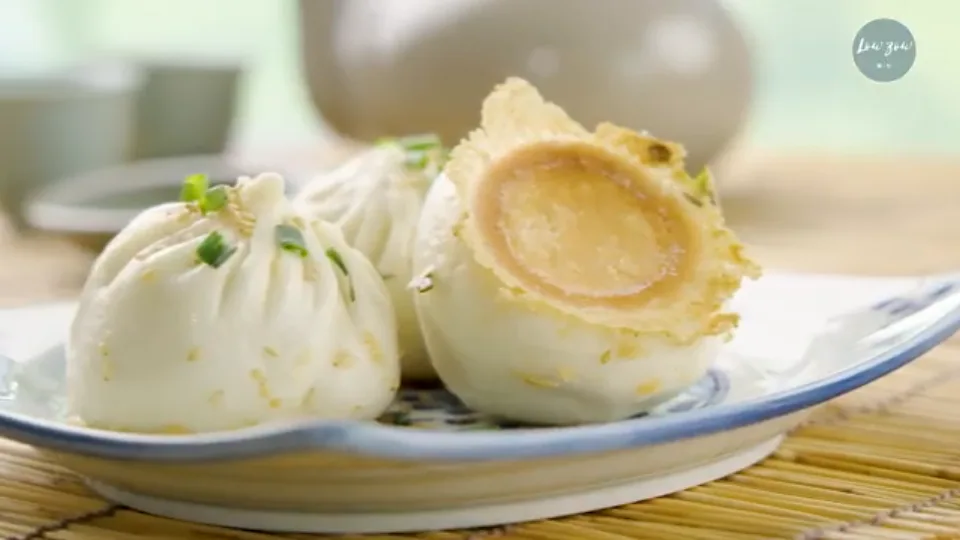
Remove the lid once moisture is mostly absorbed, scattering scallions and toasted sesame seeds over top. Lower heat to gentle flame and swirl the skillet until the base crisps into a golden, crackling crust. Invert or slide onto a platter and serve piping hot with vinegar.
How to tellInverted bun displays a continuous, lacy golden-brown crispy crust alongside soft green-garnished topsWatch at 17:45
Chef's secrets
Double letter-fold technique for silky smooth skin
Coarse or pitted bun skins result from trapped gas pockets. Rolling rested dough flat and folding into thirds twice breaks down all large air bubbles, producing an exceptionally uniform gluten matrix that proofs smoothly and cooks up pillowy yet delicate.
100:1 salt-curing: Crisp cabbage without excess water
Raw cabbage leaks water that ruins wrappers, while blanching turns it into mush. Salting diced cabbage at a 100:1 ratio for 30 minutes draws moisture out via osmosis while protecting cellular crispness. Wringing it out in a coarse mesh bag leaves intensely crunchy vegetable bits.
Staged meat emulsification and late vegetable mixing
Pork must be whipped with salt and soy sauce alone first; salt extracts myofibrillar proteins to form a sticky emulsion. Adding vegetables too early introduces competing moisture that prevents bonding. Chilling the whipped meat paste and folding in cabbage right before assembly yields juicy, tender meatballs that hold together.
Flour slurry steam-fry: Golden skirt and soft crumb
Adding plain flour slurry (6g flour to 200g water) accomplishes two essential feats: the water creates continuous hot steam under the lid to cook leavened dough and raw pork through, while the starch bakes down into a golden, crackling web that clings to the bottom of each bun.
Floating dough tester: Foolproof fermentation check
Proofing time fluctuates wildly with ambient temperature. Saving a hazelnut-sized dough scrap alongside your proofing buns gives a visual benchmark: drop the test ball into water, and if it floats buoyantly, the buns have accumulated ideal gas volume and are ready for the pan.
Storage & reheating
Fridge
Cooked buns store in an airtight container in the fridge for up to 2 days. Reheat in a skillet with a thin film of oil and a tablespoon of water covered over low heat for 3-5 minutes.
Freezer
Proofed uncooked buns can be freeze-hardened on a tray for 2 hours, then bagged and frozen for up to 1 month. Cook straight from frozen without thawing, adding 2-3 minutes to the covered steam-frying time.
Reheating
Do not microwave, as steam will turn the crispy base chewy and limp. Re-crisp in a covered skillet or warm in an oven at 180°C (350°F) for 5 minutes.
Variations
Pork & Garlic Chive Pan-Fried Buns
Replace cabbage with finely chopped fresh garlic chives. Do not salt chives; dry them thoroughly after washing, toss with a little sesame oil to seal cut edges, and fold into the whipped pork filling just before folding.
Taiwanese Vegetarian Cabbage & Vermicelli Buns
Combine salted dehydrated cabbage with soaked chopped vermicelli noodles, sautéed diced shiitakes, and spiced pressed tofu. Season with white pepper, soy sauce, and sesame oil, steam-frying with flour water for a lacy crust.
FAQ
How do you know the buns are thoroughly cooked inside?
Steam-fry covered for 8 to 10 minutes until sizzling sounds sharpen and steam subsides. Remove lid; if the pan floor is dry, the buns slide freely when nudged with a spatula, and the bases show uniform golden browning, both dough and meat are fully cooked.
Why must the wrapper edges stay free of filling oil when pleating?
Any oil or moisture from the filling on wrapper edges degrades gluten adhesion, causing pleats to burst open during second proofing or high-heat steam cooking. Escaped juices dry out the interior. Wipe fingers on a damp cloth between buns if oil spreads.
Can cornstarch or potato starch replace plain flour for the frying slurry?
Plain all-purpose flour (6g to 200g water) is specifically chosen because wheat starch forms an opaque, rigid, crisp crust that holds its crunch. Pure cornstarch or potato starch produces a glassy film that rapidly absorbs steam and becomes soft and gummy upon plating.
Can pan-fried buns be prepared ahead and frozen?
Yes. Shape buns, allow them to complete their second proof, then freeze on a floured sheet pan until rock solid before bagging. Cook directly from frozen without thawing, adding 2-3 minutes to the covered steam-frying time.
Why use pork shoulder butt instead of lean minced pork?
Pork shoulder butt (collar/butt) features roughly 30% intramuscular fat marbling that renders into rich, savory broth inside the wrapper. Pure lean ground pork will turn tough, dense, and dry once steamed and fried.
Nutrition
Estimated per serving. Actual values vary with ingredients and portion size.
No time to cook?
The same wok-fired cooking, already made for you at Bryt Kitchen.
See the menu