
Video recipe
Smoked Ground Beef Jerky: Tender, Chewable BBQ on the Go
Tender. Savory. Perfectly Smoked.
Adapted from Hey Grill Hey
Every step links back to that moment in the video
Unlike tough sliced-muscle jerky that requires jaw-fatiguing chewing, ground beef jerky delivers a tender, bite-through texture packed with savory beef flavor. A bold dose of Worcestershire sauce and brown sugar balances rich umami with a hint of sweetness, gently dehydrated over low hardwood smoke for classic roadside BBQ aroma.
What makes this version work
Use 93/7 or leaner ground beef; lower fat content allows maximum dehydration for better chew and longer storage
A generous 2 tablespoons of Worcestershire sauce delivers tangy umami that keeps every bite juicy and lip-smacking
No jerky cannon required: roll seasoned beef between parchment paper to 1/8-inch thickness and slice with a pizza cutter
Gauge doneness with the bend test at 2 hours: finished strips shrink by 50%, turn dark mahogany, and bend without snapping
Ingredients
Tap to check off — your progress is saved
Base Meat
- 93/7 Lean Ground Beef 900g93% lean or higher; elk, venison, or ground turkey also workLean venison, elk, or ground turkey
Liquid Seasonings
- Soy Sauce 30mlApprox. 2 tbsp, provides savory base seasoning and color
- Worcestershire Sauce 30mlApprox. 2 tbsp, generous measure for bold, tangy umami
- Brown Sugar 25gApprox. 2 tbsp, dark or light brown sugar for molasses warmth
Dry Rub & Spices
- Kosher Salt 10gApprox. 2 tsp; reduce by half if using fine table salt
- Freshly Ground Black Pepper 5gApprox. 2 tsp coarse ground for pungent heat
- Garlic Powder 6gApprox. 2 tsp
- Onion Powder 6gApprox. 2 tsp
- Ground Coriander 2.5gApprox. 1 tsp; adds citrusy, earthy undertone
- Red Pepper Flakes 2gOptional (approx. 1 tsp) for lingering heat
Smoking & Equipment
- Non-stick Cooking Spray to tasteLight coating on wire racks to prevent sticking
- Wood Pellets / Chunks to tasteHickory, oak, or mesquite for bold; pecan, alder, or apple for mild
Equipment
- Pellet smoker or low-temp outdoor cooker
- Flat wire cooling racks
- Jerky cannon / extruder (optional)
- Parchment paper and rolling pin (alternative method)
- Pizza cutter or sharp chef's knife
- Food prep gloves
Steps
Add Soy Sauce and Brown Sugar to Ground Beef
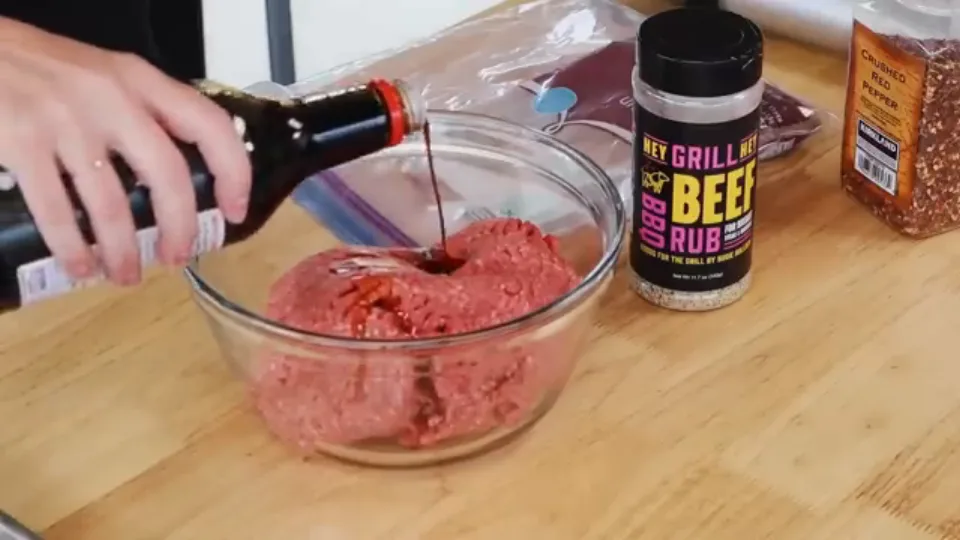 Time 2 min
Place 2 pounds of chilled lean ground beef into a large mixing bowl. Pour in 2 tablespoons of soy sauce and add 2 tablespoons of brown sugar. Either dark or light brown sugar works well, providing molasses warmth that tenderizes the beef.
How to tellDark soy liquid coats the bowl while brown sugar sits atop fresh red beefCommon mistakeAvoid fatty ground beef; rendering fat cannot dehydrate and spoils storage lifeWatch at 1:24Pour in Worcestershire Sauce for Deep Tangy Umami
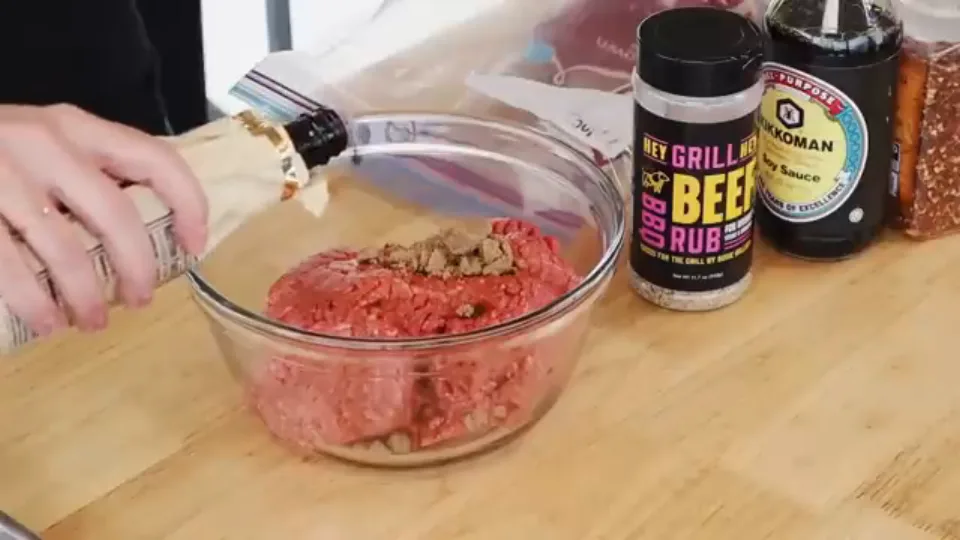 Time 2 min
Add a generous 2 tablespoons of Worcestershire sauce directly into the bowl. This bold measure provides the signature tangy, fermented backbone that gives the jerky its craveable, mouth-watering chew.
How to tellDark Worcestershire sauce saturates the sugar and meat with a distinct vinegar-malt aromaWatch at 2:20Sprinkle Dry Rub Seasonings and Red Pepper Flakes
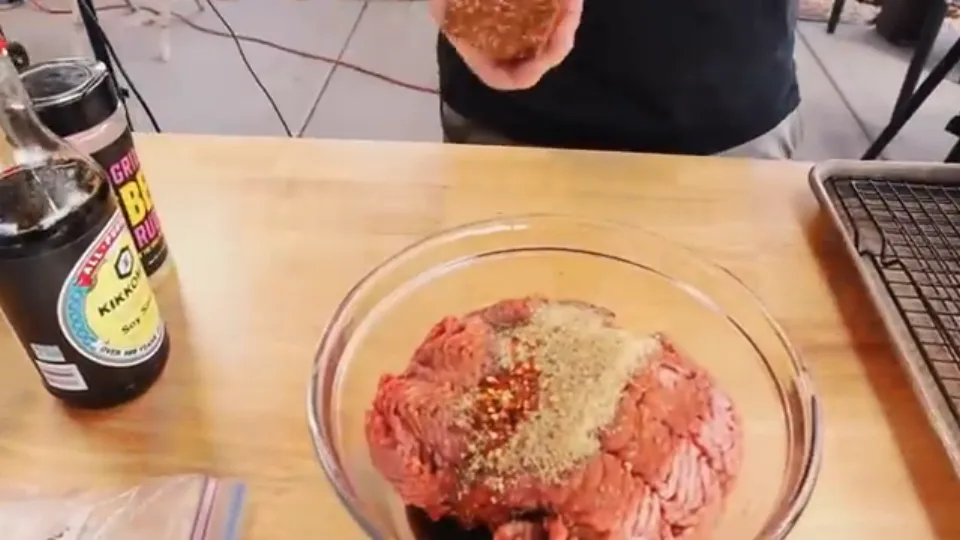 Time 3 min
Add kosher salt, freshly ground black pepper, garlic powder, onion powder, and ground coriander over the meat (or 3+ tablespoons of barbecue beef rub). Toss in 1 teaspoon of red pepper flakes if a kick of heat is desired.
How to tellA dusting of fragrant seasoning powders blankets the beef with specks of pepper and chili flakesWatch at 3:35Knead Ground Beef Thoroughly by Hand to Bind
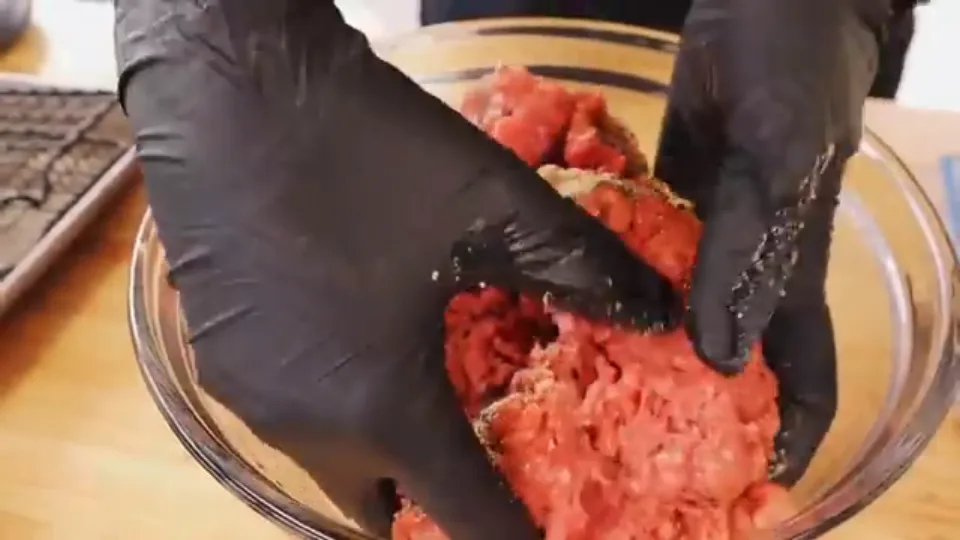 Time 5 min
Put on food prep gloves and thoroughly knead the ground beef with all liquid and dry seasonings. Work the mixture for several minutes until proteins bind and develop tackiness, ensuring the meat holds together smoothly without crumbling.
How to tellGround beef transforms from loose crumbles into a cohesive, tacky paste with no loose liquidsCommon mistakeInadequate mixing causes uneven seasoning pockets and fragile strips that snap prematurelyWatch at 3:50Extrude Jerky Strips with Cannon onto Oiled Rack
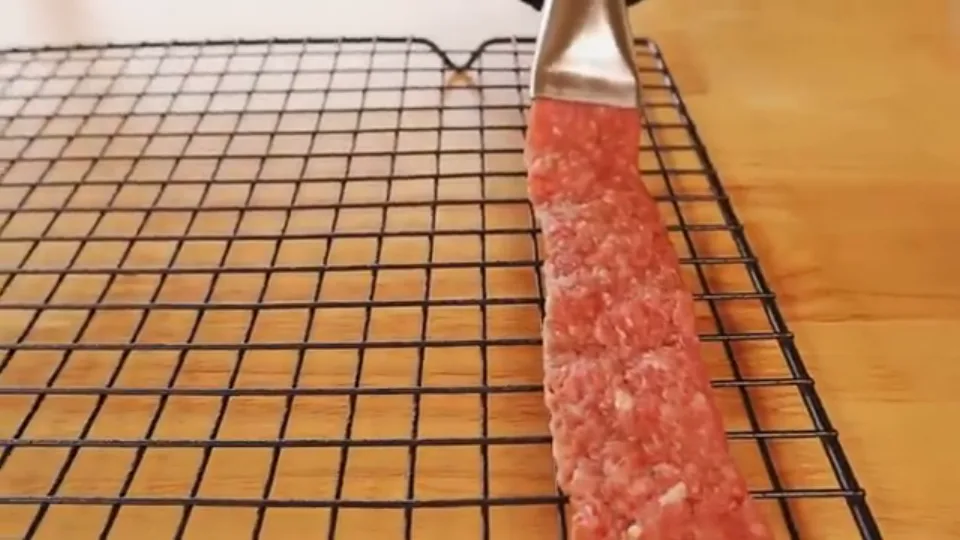 Time 10 min
Lightly mist flat wire cooling racks with non-stick cooking spray. Pack seasoned meat into the cylinder of a jerky cannon fitted with a flat extrusion tip, then steadily pump uniform, straight strips across the rack leaving space between pieces.
How to tellExtruder tip deposits neat, 1/8-inch-thick ribbons of meat spaced evenly across the wire meshWatch at 5:10Roll Beef between Parchment Sheets to 1/8-Inch (Alternative)
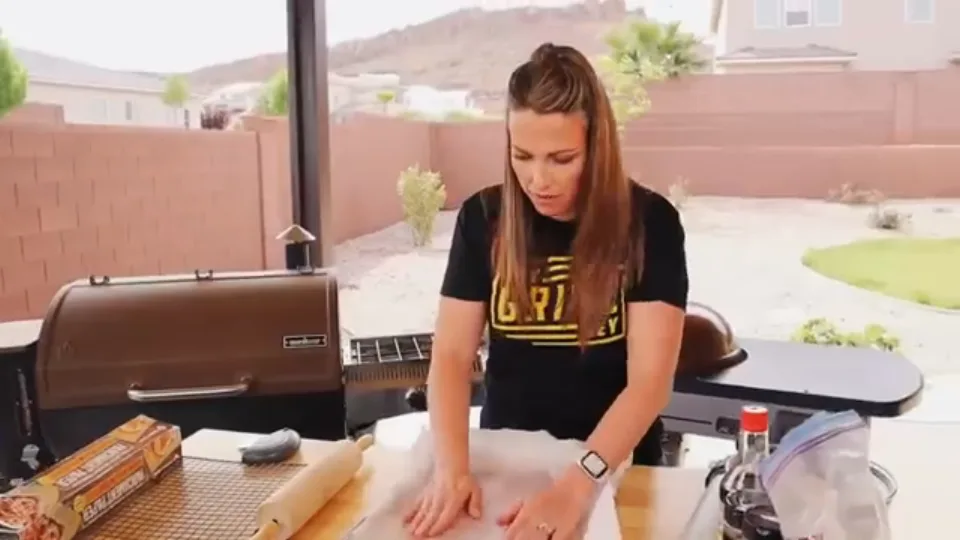 Time 8 min
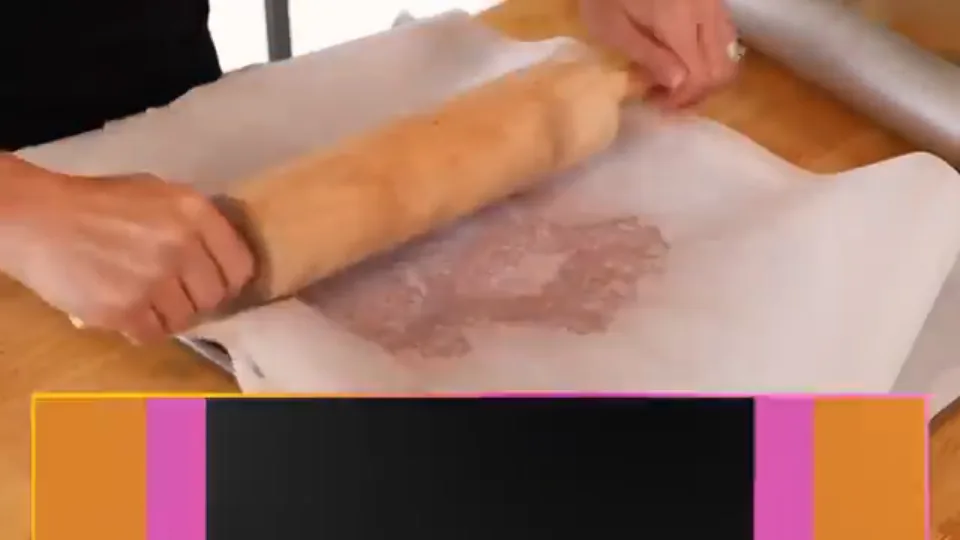
If you do not own a jerky gun, line a baking sheet with parchment paper, place the meat in the center, and top with a second sheet. Press flat with hands, then roll outward with a rolling pin to an even 1/8-inch thickness.
How to tellMeat spreads smoothly under translucent parchment into an even, level slab across the sheetCommon mistakeUneven thickness causes thin sections to over-dry and thick areas to stay undercookedWatch at 7:40Peel Top Parchment and Slice Strips with Pizza Cutter
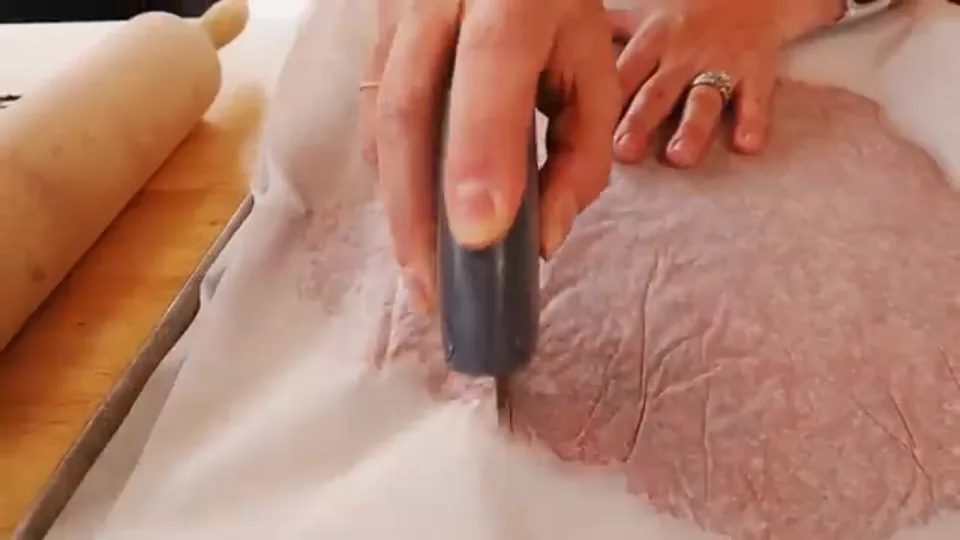 Time 5 min
Peel off the top sheet of parchment paper. Using a pizza wheel or sharp knife, slice the flattened beef slab lengthwise into uniform strips roughly 1 to 1.5 inches wide.
How to tellPizza wheel creates clean, parallel cuts through the slab of ground beefWatch at 8:15Invert Cooling Rack onto Strips and Peel Off Paper
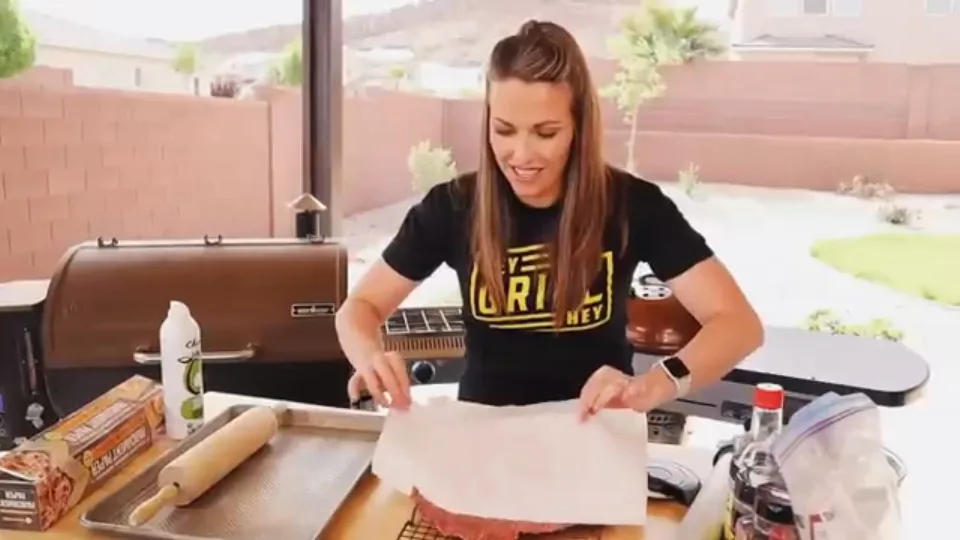 Time 5 min
Place an oiled cooling rack upside down over the cut strips, secure both ends, and swiftly flip the entire assembly over. Gently peel away the remaining parchment paper; the strips will rest cleanly on the wire rack and naturally separate as they dehydrate.
How to tellParchment lifts away smoothly leaving orderly rows of raw jerky strips on the wire gridWatch at 9:20Place Racks in Smoker to Dehydrate at 160°F–185°F
 Time 120 minHeat Low smoke (160°F–185°F)
Transfer the loaded cooling racks directly onto the smoker grates preheated to 160°F–185°F (71°C–85°C). Close the lid and smoke with oak, hickory, or fruitwood for 2.5 to 3 hours to slowly dehydrate the meat while imparting deep wood smoke flavor.
How to tellWire rack rests securely on smoker grates as thin smoke envelopes the moist raw stripsCommon mistakeDo not let temperatures exceed 190°F (88°C); excessive heat cooks the meat rather than dehydrating itWatch at 6:24Inspect and Perform Initial Bend Test at 2 Hours
 Time 30 minHeat Low smoke (160°F–185°F)
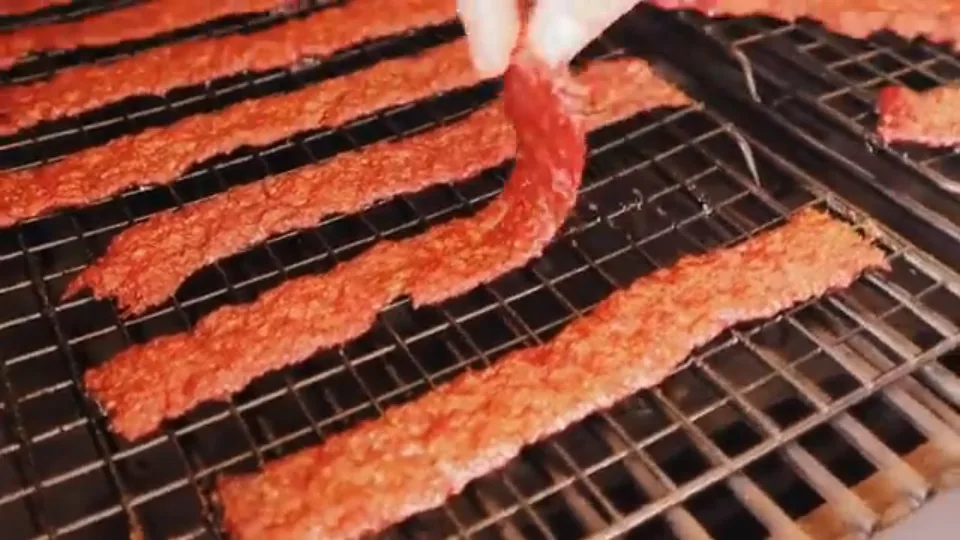
Open the lid at the 2-hour mark to check progress. The strips should have shrunk by roughly half and deepened to a rich mahogany. Pick up a strip and bend it gently; it should feel firmer than raw meat while still quite pliable, signaling about 20 to 30 minutes left.
How to tellStrips appear visibly shrunken and dark red; bending reveals springy elasticity without oil leakageWatch at 10:15Confirm Doneness and Bend Test Finished Jerky
 Time 30 min
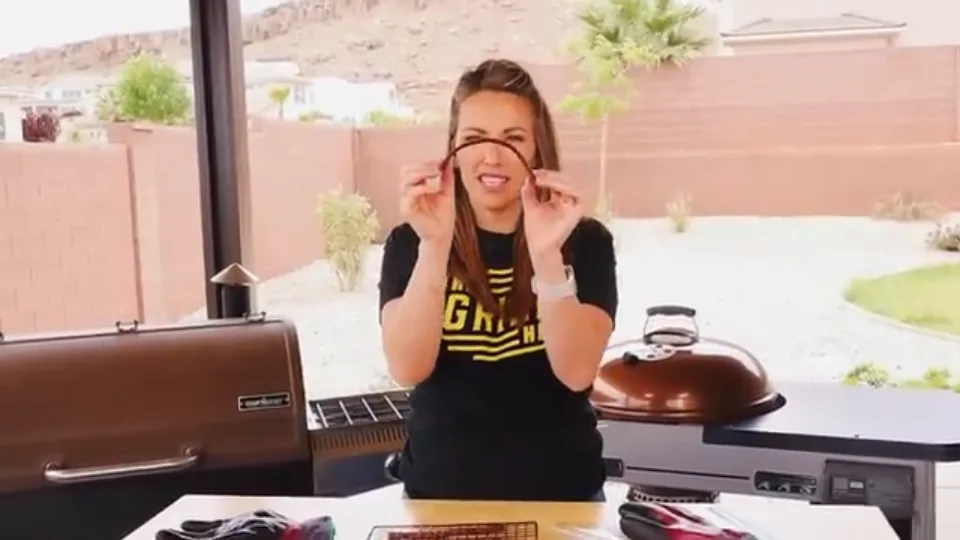
Remove jerky when it reaches a dark mahogany hue and firm, dry touch. Bend a piece into an inverted U-shape: it should bend smoothly without snapping or cracking across the center, indicating perfect moisture balance with a tender chew.
How to tellJerky flexes into an unbroken U-shape with a rich smoked sheen and distinct grainCommon mistakeSnapping indicates over-drying; feeling squishy means excess moisture remainsWatch at 11:18Cool Completely and Store in Airtight Bags
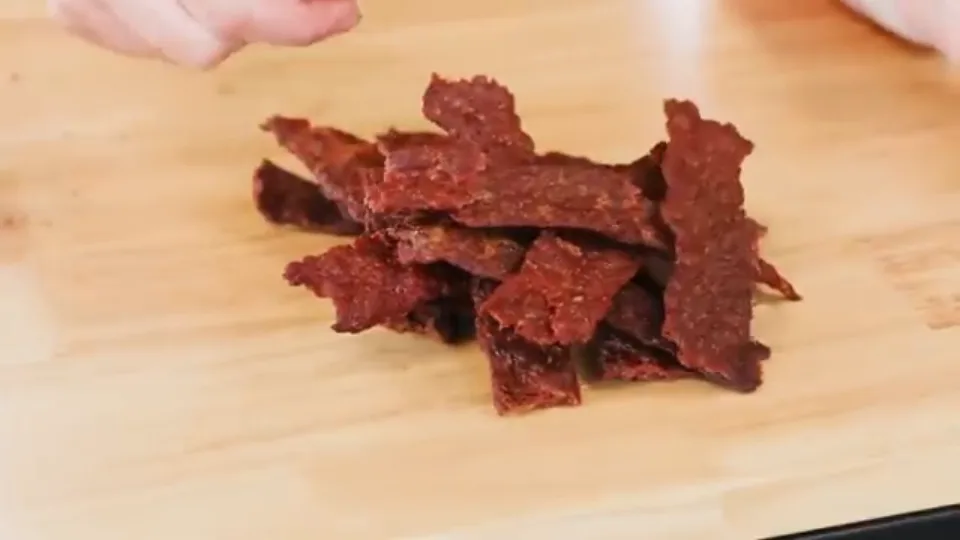
Leave the jerky on the wire cooling racks until 100% room temperature. Enjoy immediately while warm, or transfer to airtight zip-top bags and store in the refrigerator for up to 2 weeks for optimal flavor and safety.
How to tellPiled mahogany jerky strips on a cutting board, dry to the touch with visible grainCommon mistakeNever bag warm jerky; trapped condensation will cause rapid mold growthWatch at 13:25
Chef's secrets
Why 93/7 or Ultra-Lean Ground Beef is Mandatory
Jerky preservation depends on moisture removal. Animal fat does not dehydrate; excess fat renders out into a greasy film, inhibits drying, and rapidly turns rancid during storage. Using 93/7 or leaner ground beef ensures the protein forms a firm, chewable, and shelf-stable structure.
Wire Racks: Dual-Sided Smoke Circulation and Batch Handling
Extruding or placing jerky strips onto flat wire cooling racks allows you to transfer dozens of strips on and off the smoker all at once. Even better, the elevated grid lets hot smoke circulate freely from underneath, ensuring 360-degree even dehydration without trapping moisture on the bottom.
The Rolling Pin & Inversion Trick (No Jerky Gun Needed)
Without a jerky cannon, never shape strips by hand. Sandwich the meat between two sheets of parchment paper and roll to an even 1/8-inch thickness with a rolling pin. Cut into uniform strips with a pizza wheel, place an oiled cooling rack on top, and invert the entire assembly before peeling off the paper for perfectly aligned strips.
The 2-Hour Bend Test: How to Tell When Jerky is Finished
Never judge jerky doneness solely by the clock. Inspect at the 2-hour mark: finished jerky shrinks by approximately 50% and develops a deep mahogany color. Bend a strip with your fingers; it should feel firm and pliable, curving smoothly without snapping. If it feels limp or spongy, continue smoking in 20- to 30-minute increments.
No Curing Salts (Prague Powder): Why Refrigeration is Required
Commercial shelf-stable jerky uses sodium nitrite (curing salt #1) to prevent botulism at room temperature. This home recipe intentionally skips chemical curing salts, relying purely on salt, dehydration, and hardwood smoke. Because it contains no preservatives, store it in an airtight zip-top bag in the refrigerator for up to 2 weeks.
Storage & reheating
Fridge
Refrigerate in a heavy-duty zip-top bag once completely cool; keeps for up to 2 weeks
Freezer
Freeze in vacuum-sealed or freezer bags with air removed; keeps for 3 to 6 months
Reheating
Ready to eat cold or at room temperature. Rest 10 minutes out of the fridge for optimal aroma
FAQ
Can I use 80/20 ground beef for this recipe?
Not recommended. 80/20 beef contains 20% fat, which renders during dehydration, leaving the jerky greasy, soggy, and prone to rapid rancidity. For the best chew and shelf life, stick to 93/7 or leaner ground beef, or use naturally lean game meat like venison or elk.
Can I make this in a standard oven or food dehydrator without a smoker?
Yes. In a home oven, set to its lowest temperature (around 160°F–170°F / 70°C–75°C) and prop the door slightly cracked with a wooden spoon to vent moisture, baking on racks for 2.5 to 3.5 hours. In a food dehydrator, dry at 160°F for 4 to 6 hours. Add 1/2 teaspoon of all-natural liquid smoke to the beef mixture to replicate the campfire flavor.
Why must the jerky cool completely before bagging?
Hot jerky continues to release warm moisture vapor. Sealing it in a bag while warm causes condensation droplets to form on the bag walls and meat surface, inviting mold growth within days. Let the jerky rest on wire racks until 100% room temperature before sealing.
Can smoked ground beef jerky be frozen?
Yes. For extended storage beyond 2 weeks, pack fully cooled jerky into freezer-safe zip bags or vacuum sealers, squeezing out all air. Freeze for 3 to 6 months. Thaw in the refrigerator overnight before snacking; the texture remains wonderfully tender.
Do I need an instant-read thermometer to check internal temperature?
For guaranteed food safety, you can insert an instant-read probe horizontally into the thickest strip to verify it has reached 165°F (74°C). After 2.5 to 3 hours in a 170°F–185°F smoker, thin strips naturally surpass USDA pathogen lethality thresholds.
Nutrition
Estimated per serving. Actual values vary with ingredients and portion size.
No time to cook?
The same wok-fired cooking, already made for you at Bryt Kitchen.
See the menu