
Every step links back to that moment in the video
Refined through a decade of bakery production in Hong Kong and Canada, this piped butter cookie formula achieves bakery-level melting texture without losing its intricate ridges. High-fat butter paired with 35% whipping cream and whole milk powder delivers an intensely aromatic dairy crumb.
What makes this version work
Butter precisely tempered to 28°C and whipped on high for 5 minutes into a vaseline-soft, pure white emulsion
Triple-dairy richness: 90% milk-fat butter, whole milk powder, and 35% whipping cream for intense aroma
Hand-folded until dough clears the paddle to expel excess air, chilled 15 minutes to lock sharp ridges in the oven
Sealed airtight while still warm within 5 minutes of cooling, locking in subtle steam for an instant melt-in-mouth crumb
Ingredients
Tap to check off — your progress is saved
Butter Base
- Salted Butter (90% Milk Fat) 113gTempered at 28°C for 5 hours until vaseline-softCan substitute with standard unsalted butter plus 1.5g fine salt per 100g butter
- Icing Sugar 38gSifted to remove lumps
- Whole Milk Powder 5gSifted
Flour & Emulsion
- Cake Flour 113gSifted
- Cornstarch 40gSifted, relaxes gluten for tender crumb
- Whipping Cream (35% Milk Fat) 16gAdds rich dairy moisture and ensures smooth piping
Equipment
- Stand mixer with whisk and paddle attachments
- Silicone spatulas (large and small)
- 8-point star piping tip
- Heavy-duty reusable piping bag (canvas or TPU)
- Silicone cookie baking mat (convection-resistant)
- Temperature-controlled proofing box (optional, for butter tempering)
Steps
Temper Butter to 28°C for Full Softening
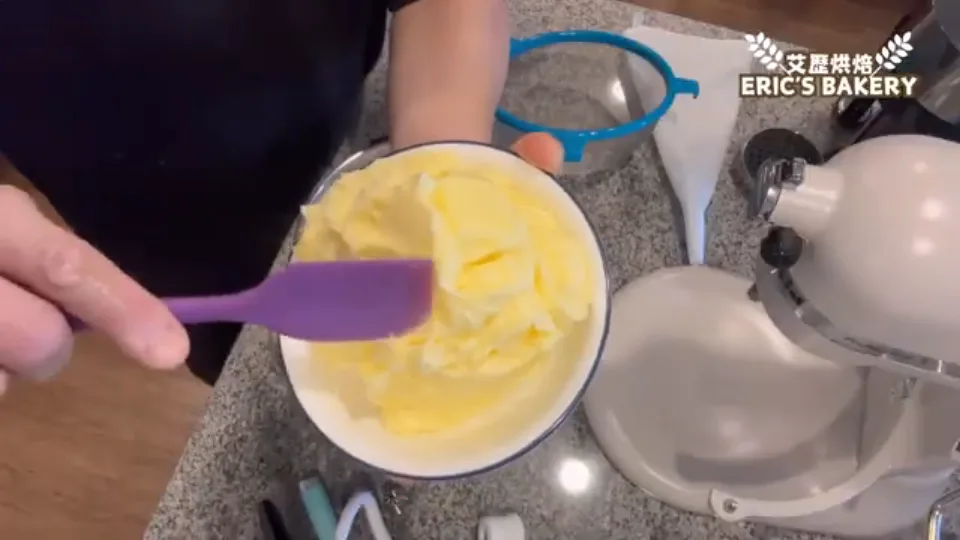
Take salted butter from the refrigerator and rest it in a 28°C proofing cabinet or warm room for about 5 hours. Ensure the core softens completely into a uniform vaseline-like paste without melting into liquid or leaving cold hard pockets.
How to tellButter resembles smooth petroleum jelly and spreads effortlessly under a spatulaCommon mistakeIf butter melts into liquid oil, the emulsion collapses and cookies will spread flat; under-softened butter makes piping impossible.Watch at 2:52Add Softened Butter and Sift in Icing Sugar and Milk Powder
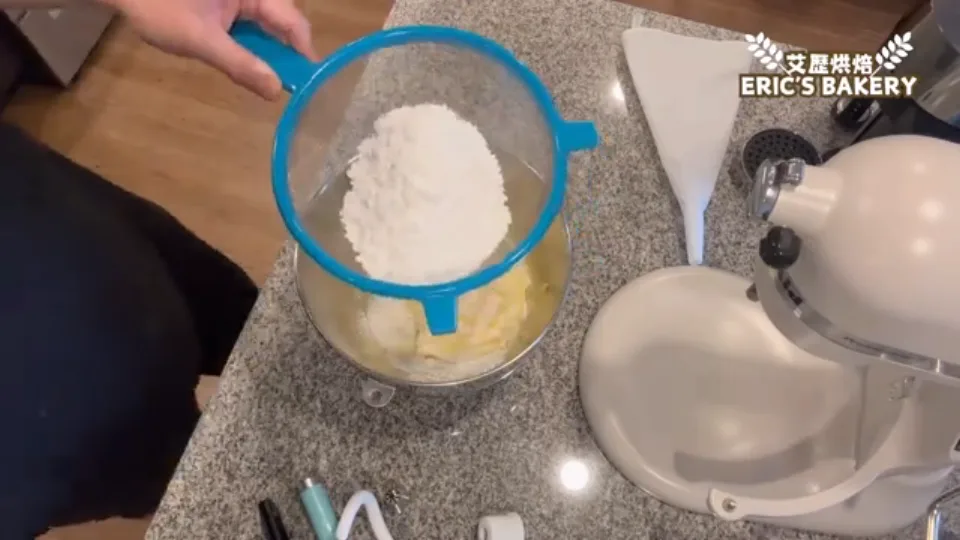 Time 2 min
Transfer the softened 28°C salted butter into the stand mixer bowl. Sift the icing sugar and whole milk powder through a fine strainer into the bowl, breaking up any compacted lumps for a silky blend.
How to tellFine white powder evenly blankets the butter without any dry clumpsWatch at 3:15Hand-Stir with Whisk Attachment to Prevent Flying Dust
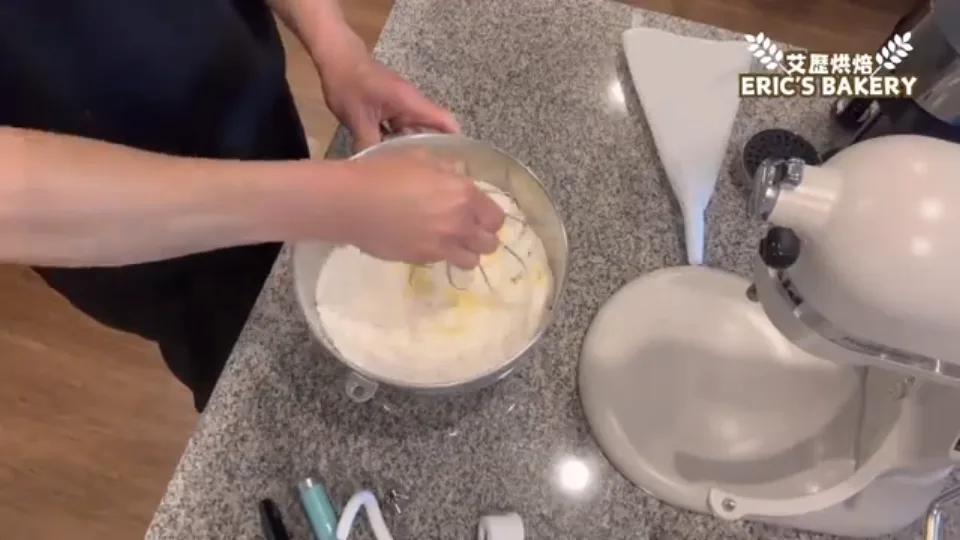 Time 1 min
Before turning on the mixer, use the detached whisk attachment to manually swirl and press the powders into the softened butter. This coats the dry ingredients and prevents a cloud of sugar dust from blowing across the counter upon startup.
How to tellDry powders are mostly absorbed into the butter without loose surface dustWatch at 3:38Whip on High Speed for 5 Minutes to Full White Aeration
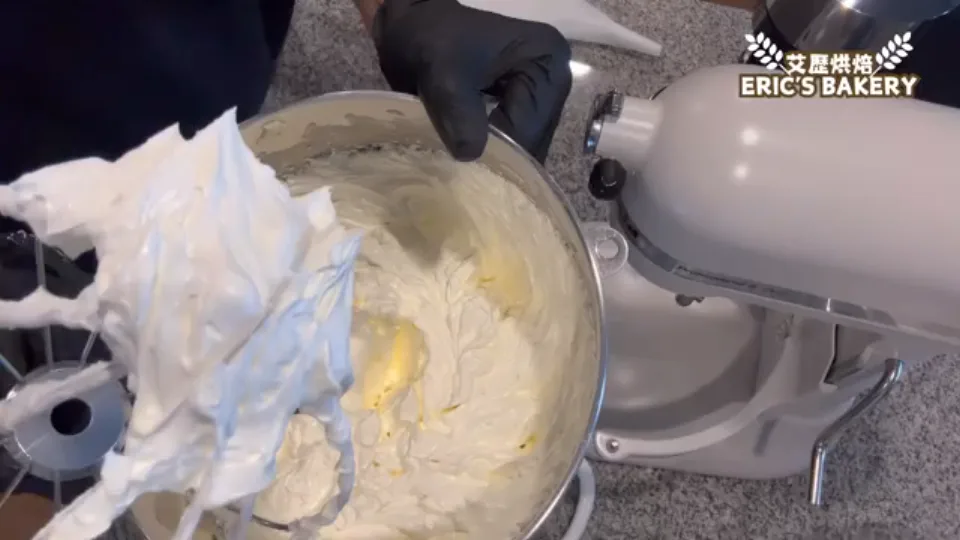 Time 5 min
Lock the whisk attachment into the mixer and whip on maximum speed for 5 continuous minutes. The mixture will lighten from pale yellow to pure white as it traps micro-air bubbles, expanding into a feather-light cream.
How to tellButter turns stark white and holds light, pillowy peaks like whipped creamCommon mistakeUnder-whipping leaves insufficient aeration, making the dough too stiff to pipe; ensure a full 5-minute whip to pure white.Watch at 4:16Sift in Cake Flour and Cornstarch, Then Pour in Whipping Cream
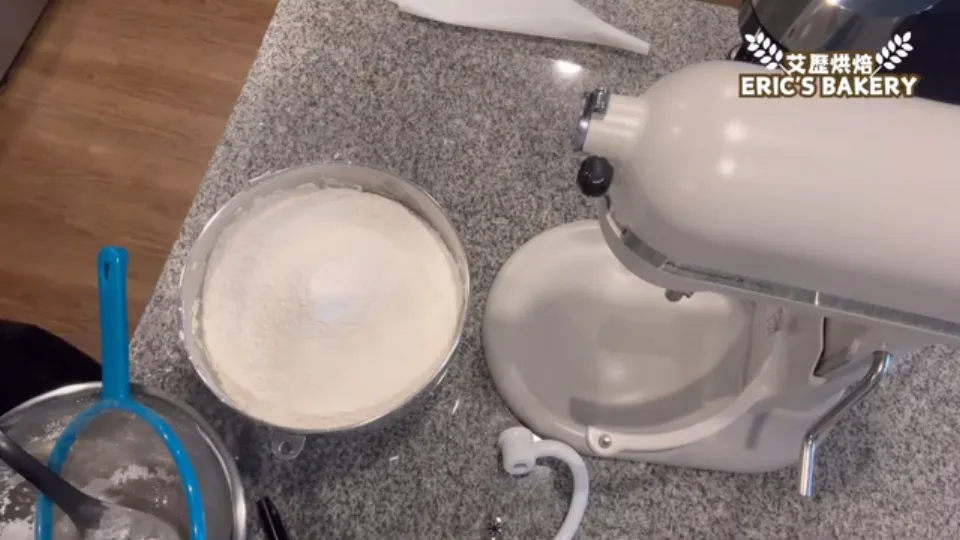 Time 3 min
Combine cake flour and cornstarch, then sift them together into the whipped butter bowl; cornstarch weakens gluten formation for maximum melt-in-the-mouth tenderness. Pour in the 35% whipping cream to infuse rich dairy fat and supply the moisture needed for smooth extrusion.
How to tellFluffy sifted flour sits atop the whipped butter with cream pooled in the centerWatch at 5:22Switch to Paddle Attachment and Mix on Low for 5 Minutes
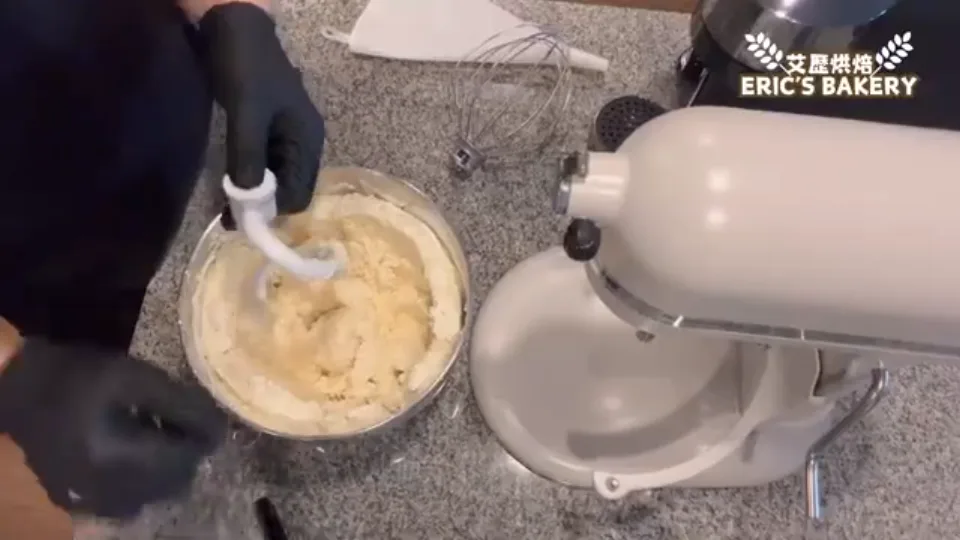 Time 5 min
Replace the whisk with the paddle attachment. Mix on the lowest speed setting for 5 minutes, allowing the flour and cream to incorporate gently into the butter base. Low speed prevents gluten development without flour dust scatter.
How to tellDry flour disappears into a cohesive, moist, slightly sticky dough ballWatch at 6:35Hand-Fold with Spatula to Degas until Dough Clears the Tool
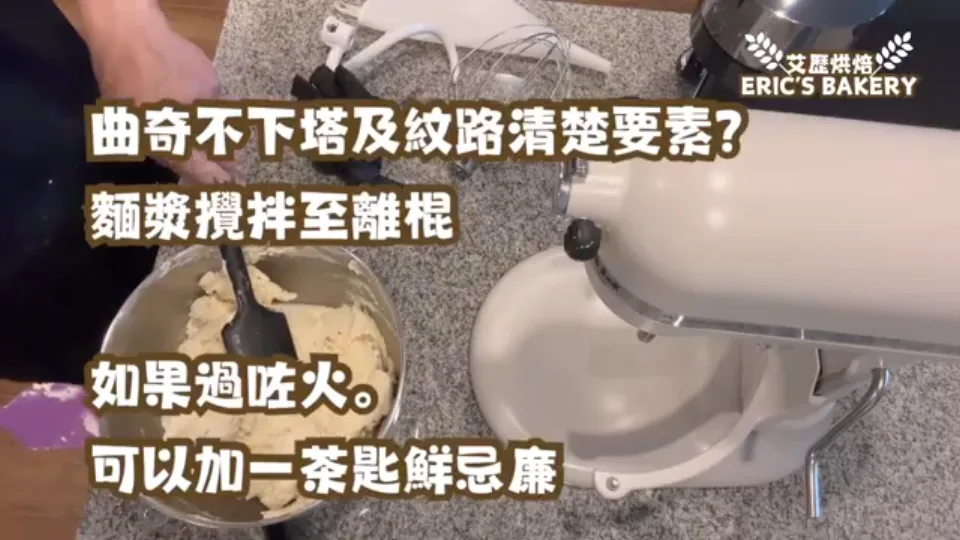 Time 2 min
Remove the bowl from the mixer and switch to a silicone spatula for manual finishing. If baked with raw mixer air pockets, coarse bubbles expand and destroy ridge definition. Fold the dough by hand to expel excess air until it cleanly releases from the spatula without sticking—the sweet spot between sharp ridges and supple piping.
How to tellThe dough pulls cleanly away from the spatula edge rather than clinging as a heavy massCommon mistakeIf over-folded into a stiff dough, stir in 1 teaspoon (~5g) of 35% whipping cream to restore piping suppleness.Watch at 7:40Load Dough in Small Batches into Heavy-Duty Piping Bag
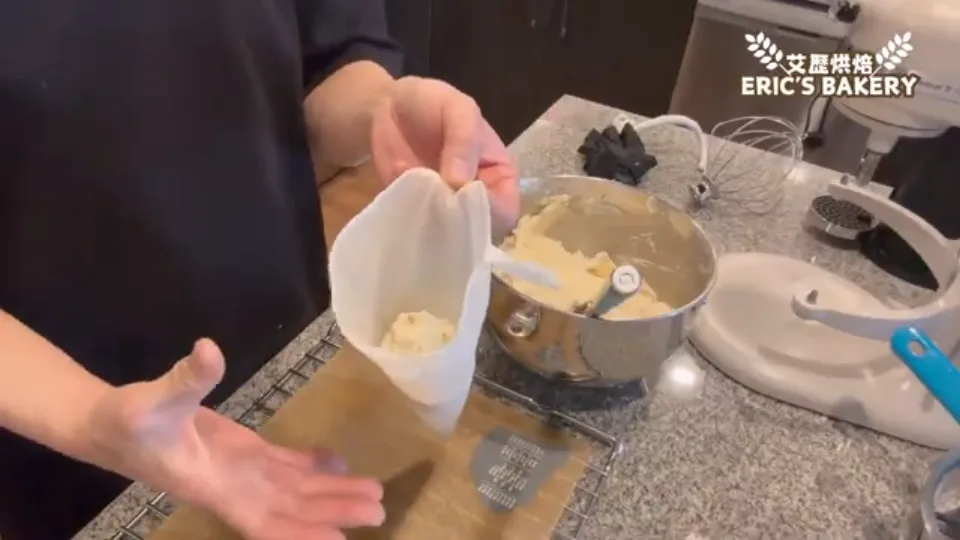 Time 2 min
Insert the 8-point star piping tip into a reinforced reusable piping bag. Use the spatula to load only a small portion—about one-third full—at a time. Never overload the bag; working in small batches prevents wrist fatigue and gives precise extrusion control.
How to tellPiping bag holds a modest palm-sized portion, compact and comfortable to squeezeCommon mistakeAvoid thin disposable bags; dense cookie dough exerts high hydraulic pressure that easily bursts thin plastic seams.Watch at 8:08Burp Trapped Air Over the Bowl to Prevent Explosive Sputter
 Time 1 min
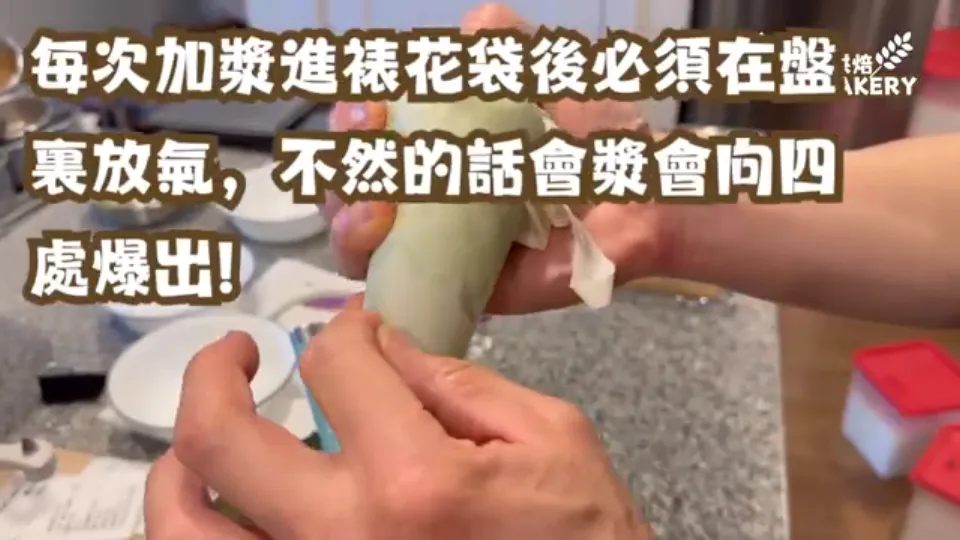
After filling the bag, never pipe directly onto the baking mat. Point the tip over the mixing bowl and squeeze firmly along the bag to pop and purge trapped internal air pockets until dough extrudes in a solid stream. Skipping this causes sudden air bursts that splatter dough and ruin cookie shapes.
How to tellTrapped air pops out with an audible burp, followed by a dense, gap-free ribbon from the nozzleWatch at 9:54Pipe Fluted Rosettes Vertically to 3-4 Layers with a Release Tap
 Time 6 min
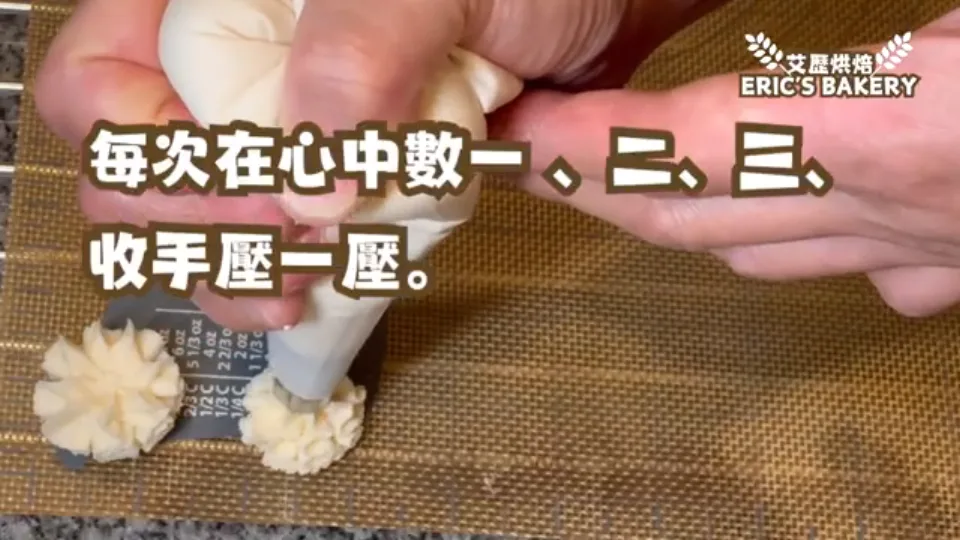
Hold the piping bag vertically with the tip roughly 1cm above the silicone mat. Apply steady pressure while making subtle lateral oscillations, counting 'one, two, three' to build 3 to 4 layered ruffles. To finish, ease off pressure, give a gentle downward tap, and lift away cleanly for an upright, symmetrical rosette.
How to tellCookies stand 3-4 fluted layers tall (approx. 2.5cm) with upright, sharp star ridgesCommon mistakeDo not exceed 4 tiers in height; overly tall rosettes lose balance as butter softens and tilt into a leaning tower.Watch at 8:45Chill Piped Cookies in Refrigerator for 15 Minutes to Lock Ridges
 Time 15 min
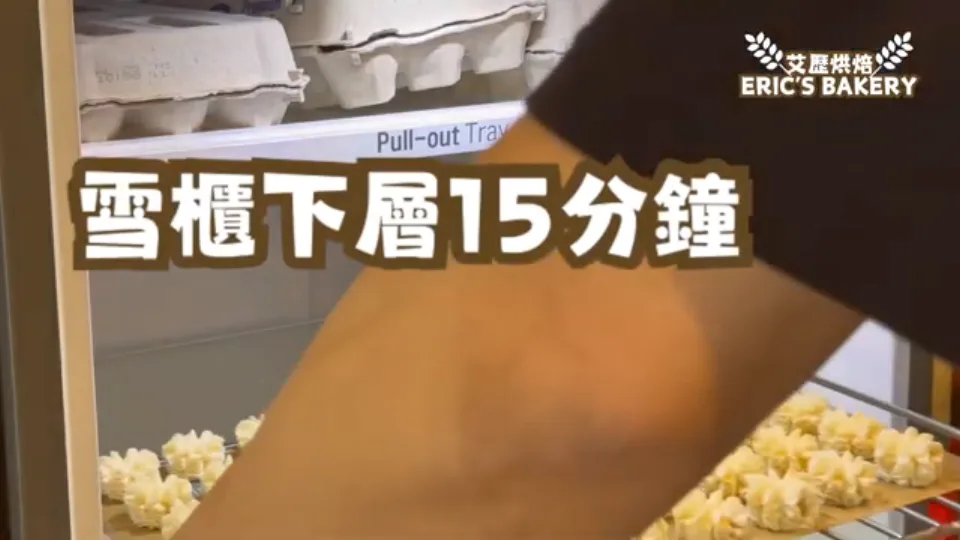
Transfer the loaded baking sheets to the lower refrigerator shelf to chill for 15 minutes. This firms up butterfat that softened from room temperature and hand contact. Meanwhile, preheat the convection oven to 290°F (143°C).
How to tellChilled dough feels firm and cold to the touch, with rigid ridges that resist slight contactCommon mistakeNever skip the chill step! Baking room-temperature dough causes soft butterfat to melt before starch gelatinizes, obliterating all ridges.Watch at 11:05Bake at 290°F for 35 Minutes to Evaporate Moisture and Reveal Ridges
 Time 35 minHeat Low (290°F / ~143°C)
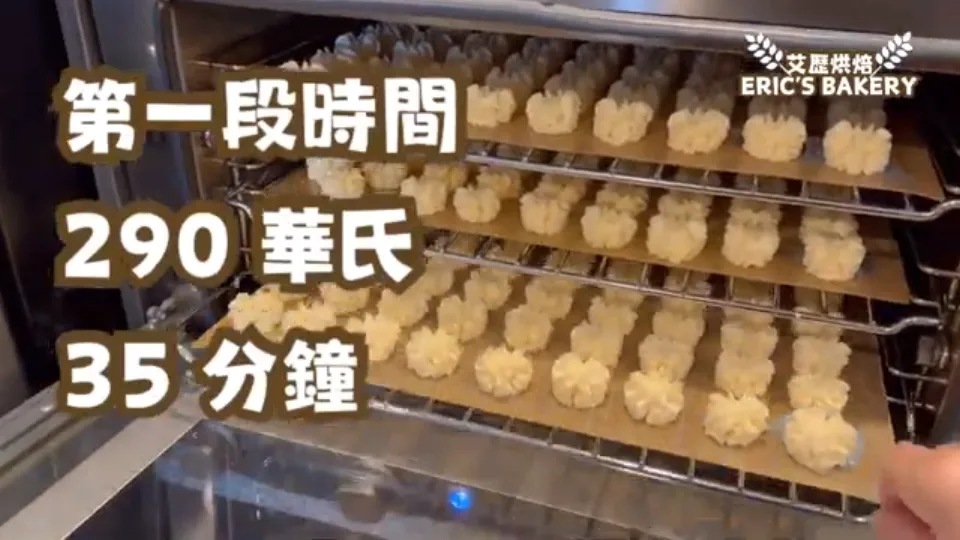
Place the chilled sheets into the preheated 290°F (143°C) convection oven on the middle racks and bake for 35 minutes. Cookies will expand slightly and soften around minute 10; as internal steam slowly evaporates over the final 10 minutes, the fluted ridges contract and resharpen crisply.
How to tellIn the final 10 minutes, cookies shrink back tight with razor-sharp folds and lightly blonde basesWatch at 11:25Increase Heat to 325°F for 5 Minutes for Golden Finish
 Time 5 minHeat Medium (325°F / ~163°C)
Once the initial 35 minutes conclude, immediately turn the oven dial up to 325°F (163°C) and bake for an additional 5 minutes to brown. This short blast caramelizes surface milk solids, giving ridge crests an appetizing golden hue before taking the sheets out.
How to tellRidge highlights turn a warm toasted gold with rich browned-butter aroma filling the roomWatch at 12:40Cool 5 Minutes on Wire Rack and Seal Airtight While Warm
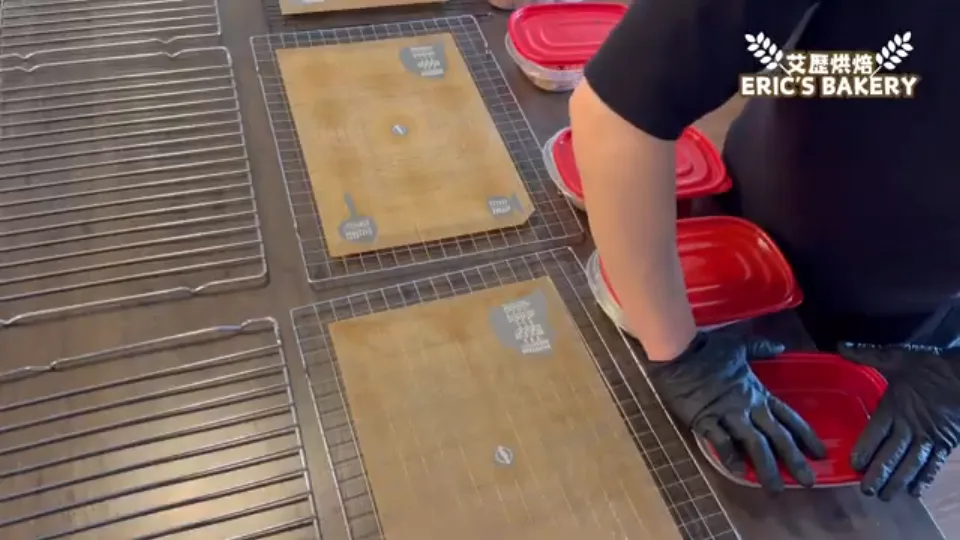 Time 5 min
Fresh cookies are delicate; slide the silicone mats onto wire cooling racks for exactly 5 minutes so surface steam dissipates. While cookies still hold gentle core warmth and trace humidity, immediately pack and snap-seal into airtight plastic containers or cookie tins. Trapping this micro-moisture within the warm fat-flour matrix is the master secret behind that melt-in-the-mouth texture instead of a hard dry crunch.
How to tellAfter 5 minutes cookies can be handled gently without breaking; sealed containers show no heavy liquid condensationCommon mistakeNever leave cookies exposed on the counter to cool completely! Over-drying results in a hard, brittle snap rather than a velvety melt.Watch at 13:15
Chef's secrets
Triple-Dairy Emulsion: High-Fat Butter, Cream, and Milk Powder
Most traditional cookies use standard 80-82% butter. This formula utilizes 90% milk-fat salted butter to drastically reduce water content while maximizing aromatic butterfat. Paired with whole milk powder for dairy solids and 35% whipping cream for supple moisture, this triple-dairy combination delivers an extraordinarily deep, lingering fragrance.
Precise 28°C Tempering and High-Speed Aeration
Butter consistency dictates both effortless piping and sharp ridge definition. Butter must rest at 28°C for around 5 hours to soften completely into a uniform vaseline-like paste without any liquid melting or hard cores. Whipping on high speed for a full 5 minutes then incorporates micro-air pockets until the butter turns feather-light and pure white.
The 'Paddle-Release' Degassing Threshold for Unshakable Ridges
While whipped butter is airy, excess coarse air pockets after adding flour cause cookies to puff up and collapse in the oven, erasing fine ridges. Conversely, over-mixing expels all air and turns the dough rock-hard. By finishing with a hand spatula until the dough cleanly releases from the tool without clinging, you hit the exact balance between easy extrusion and oven stability.
Piping Bag Degassing and 15-Minute Cold Chilling
Never overfill the piping bag; loading small portions keeps extrusion pressure manageable. Always squeeze the bag over the bowl beforehand to burp out trapped air pockets and prevent dough explosions mid-pipe. Once piped 3-4 layers tall, chilling the entire tray in the refrigerator for 15 minutes resets the softened butterfat into a firm structure that withstands initial convection heat without melting.
Two-Stage Convection Baking and Warm-Sealing for Instant Melt
Bake at a low 290°F (143°C) for 35 minutes: the cookies will puff slightly mid-bake, then contract as moisture evaporates, restoring crisp ridges. A final 5-minute blast at 325°F (163°C) provides golden caramelization. Cool on wire racks for exactly 5 minutes, then seal into airtight tins while still warm: this traps trace moisture within the crumb, creating an ethereal melt-in-the-mouth texture rather than a hard dry snap.
Storage & reheating
Fridge
Store at room temperature in an airtight container; refrigeration is not recommended as cookies easily absorb moisture and fridge odors.
Freezer
Unbaked piped cookies can be frozen solid on trays and stored airtight for up to 1 month. Bake directly from frozen at 290°F without thawing, adding 3-5 minutes to the initial bake.
Reheating
If cookies lose crispness over time, refresh in a 250°F (120°C) oven for 3-5 minutes, then reseal while warm to restore tenderness.
Variations
Uji Matcha Piped Cookies
Replace 6g of cake flour with 6g of high-grade Uji matcha powder, sifted together with the flour and cornstarch. The vibrant earthy tea profile balances rich butterfat with pleasant bitterness.
Rich Mocha Coffee Cookies
Sift 3g unsweetened cocoa powder and 2g espresso powder along with the dry ingredients, or dissolve in warm cream before mixing. Yields a deeply aromatic mocha aroma with crisp fluted edges.
FAQ
Can I use regular supermarket butter if 90% milk-fat butter is unavailable?
Yes, though with slight differences in richness and moisture balance. Standard commercial butter contains 80-82% fat and higher water content (~16-18%). If using regular unsalted butter, add about 1.5g fine salt per 100g butter. Monitor dough moisture closely and avoid adding extra liquid, as excess water will cause ridges to blur during baking.
What should I do if the dough is too stiff to pipe or bursts the piping bag?
Stiff piping stems from two common issues: under-tempered butter (<28°C) or over-mixing that knocked out too much air. To fix stiff dough, fold in 1 teaspoon (~5g) of 35% whipping cream with a spatula to restore suppleness. Also ensure you use a heavy-duty reusable canvas or TPU piping bag, fill it only one-third full, and grip close to the tip to maximize leverage.
Why do my cookies lose their sharp ridges and melt flat in the oven?
Blurring ridges typically trace back to three culprits: skipping the spatula degassing step (leaving pockets that balloon in heat), skipping the 15-minute refrigerator chilling before baking (causing warm fat to puddle instantly), or baking at too high an initial temperature. Adhering strictly to the 15-minute chill and 290°F low-temperature bake guarantees razor-sharp fluted edges.
How should I adjust baking settings if using a standard home oven without convection?
The chef uses a commercial convection oven with active airflow for uniform heat. In a standard conventional radiant oven without a fan, place the baking tray on the middle rack at 290-300°F (145-150°C), extend the bake time by 5-8 minutes, and rotate the baking sheet halfway through to ensure even coloration.
Why must the cookies be packed airtight while still warm? What happens if they cool completely?
This is the baker's core trade secret: resting cookies on wire racks for just 5 minutes lets surface moisture dissipate while the core retains gentle warmth. Sealing them immediately into an airtight container allows the internal residual steam to temper the crumb into a cloud-like melt-in-mouth texture. Cooling them completely on open racks dries out the fat-flour matrix, leaving cookies hard and brittle.
Nutrition
Estimated per serving. Actual values vary with ingredients and portion size.
No time to cook?
The same wok-fired cooking, already made for you at Bryt Kitchen.
See the menu